Removal
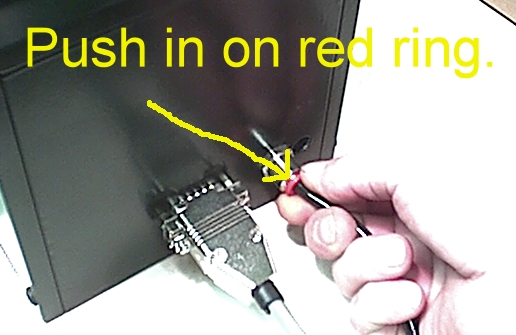
1. Disconnect the air supply from the cutting head. Press in on the red collar, then pull out on the tube.
Also disconnect the Control Cable from the cutting head.
It's sometimes necessary to use a small pair of needle-nose pliers to hold the jack screw, when loosening the holding screws as shown below.
2. Remove the 4 screws securing the Guard Plate.
3. Force the Top Blade to the down position by pushing down on the two linear shafts.
4. Remove the two shoulder bolts from the Top Blade. (3 for the CC7 Models)
5. Remove the two flat head screws from the Bottom Blade. (3 for the CC7 Models)
Installation
1. Make sure the surface that the Bottom Blade mounts to is clean
and free from any raised areas, as well as the back side of the
Bottom Blade.
2. Mount the Bottom Blade using 2 flat head screws. (3 for
the CC7 Models)
(Use Blue Loc-Tite on the threads)
3. For the Top Blade, use one of the shoulder bolts without the spring to hold in place. Screw it all the way in, where the shoulder goes through the blade.
4. Install the spring on the other shoulder bolt. Apply a drop of Red Loc-Tite to the threads and install the shoulder bolt, making sure the shoulder goes through the blade and bottoms against the Carrier Block.
5. Remove the first shoulder bolt and follow step 4 for it also.
6. Adjust the Top Blade as outlined in the Blade Adjustment procedure.
7. Re-mount the guard plate.